How to revert to GNOME Classic Desktop?
I'm used to GNOME Classic and personally don't want to change to anything else, but it seems there is no more GNOME Classic in the Oneiric release. After apt-get installed gnome-session and all, though there comes back the GNOME Classic option in the session listbox, however, after logged in, it seems not the expected one.
There is no System menu in the top bar, and I couldn't customize panels at all. I want to change the appearance(theme), but I can't find Appearance menu at all. And much more differences to my previous experience of GNOME classic shell.
There are multiple valid answers for this question spanning over several versions of Ubuntu. For your convenience an index of each below:
112 Answers
11.10 Overview
The older GNOME 2.x experience has been retired in GNOME, however you can use the GNOME 3.x classic mode (as shown below) to make an approximation of the older experience.
install prerequisites
In the software center you have the option to install Gnome Shell :
Similarly - search for CompizConfig Settings Manager and install this package - we'll need that later.
Whilst you are there you can also install gnome-tweak-tool to further customise your desktop.
To quickly install all three of these at once, copy and paste the following into a terminal:
sudo apt-get install gnome-shell compizconfig-settings-manager gnome-tweak-toolenabling compiz
Now perhaps the tricky part - getting gnome classic to function with compiz:
In a terminal copy and paste the following:
gksudo gedit /usr/share/gnome-session/sessions/gnome-classic.sessionNow edit the file shown to contain this line entry:
How to login to Gnome-Classic
Save, logout and in your session options choose Gnome Classic
Changing the theme
You'll notice that the default Ubuntu Ambiance theme doesn't look great in Gnome Classic. We can correct this by changing to a Gnome 3 friendly theme.
... and choosing Appearance
Change the theme to Adwaita...
Note - see the linked questions below for other theming options.
Changing Icons
Launch gnome-tweak-tool via the menu option:
- Applications --> Other --> Advanced Settings
Change the icon theme as shown:
Restructure the desktop layout
Now lets get back the panels to something that we are familiar with...
Press Alt+Win and right-click the top menu bar - N.B. Win is the Windows Symbol key
(If you are using Gnome Classic (No Effects) i.e. gnome fallback mode then to add to the panel use Alt and right-click)
Choose Add to Panel
Click the option shown and click the button Forward
Repeat the Alt+Win + Right Click the date and choose Delete to delete the clock.
Repeat this delete procedure for the other applets on the top-panel.
Note - if an error appears indicating that the Panel has reloaded you can safely ignore this.
Repeat the Alt+Win + Right Click the top panel - add the applet Accessibility.
Repeat the Alt+Win + Right Click on bottom panel - add the applet Show Desktop and move to the bottom left.
Repeat the Alt+Win + Right Click on bottom panel - add the applet Wastebasket and move to the bottom right.
Now we need to change the number of workspaces back to two.
Navigate to Applications - Other - CompizConfig Settings Manager - General Options - Desktop Size and change the Vertical Virtual Size value to 1
Install the indicator-applet
Now lets install the indicator-applet:
- see the linked question below to add a PPA containing the indicator-applet
To add to the panel:
Alt+Win+Right click the panel and choose Add To Panel and add the following indicator
Finish off by Alt+Win+Right click the indicator-applet and move it to the right side of the top panel.
Optional:
- You can install fonts-cantarell
if you want to use the default upstream GNOME font
Linked Questions:
- Delete extra toolbar on top of the screen in GNOME fallback mode?
- How do I revert Alt-tab behavior to switch between windows on the current workspace?
- How do I change to a theme not listed in the Appearance screen?
- If you use autologin you need to do this: How do I set the GNOME Classic login to be the default with autologin?
- How to re-add indicator-applet for 11.10
- How to customize the gnome classic panel
- Warning: What are some of the issues with CCSM and why would I want to avoid it?
For 11.04
Log in with the classic GNOME session by selecting your username and then selecting Ubuntu Classic:
From then on GDM will remember your setting. To permanently make the Classic Session be the default, run the Login Settings tool and select the classic desktop:
12.04 Overview
The older GNOME 2.x experience has been retired in GNOME, however you can use the GNOME 3.x classic mode (as shown below) to make an approximation of the older experience.
Install the prerequisites:
Similarly install myunity:
How to login to Gnome-Classic
Save, logout and in your session options choose Gnome Classic
Restructure the desktop layout
Now lets get back the panels to something that we are familiar with...
Press Alt+Win and right-click the top menu bar - N.B. Win is the Windows Symbol key
(If you are using Gnome Classic (No Effects) i.e. gnome fallback mode then to add to the panel use Alt and right-click)
Choose Add to Panel
Click the option shown and click the button Forward
After clicking Add, add the Universal Access applet.
Repeat the Alt+Win + Right Click on bottom panel - add the applet Wastebasket
Alt+Win + Right Click over the Wastebasket and move to the bottom right.
Now we need to change the number of workspaces back to two.
Launch MyUnity via its icon in System Settings
change the Vertical Virtual Size value to 1
Optional:
- You can install fonts-cantarell if you want to use the default upstream GNOME font
Linked Questions:
- Delete extra toolbar on top of the screen in GNOME fallback mode?
- How do I revert Alt-tab behavior to switch between windows on the current workspace?
- How do I change to a theme not listed in the Appearance screen?
- If you use autologin you need to do this: How do I set the GNOME Classic login to be the default with autologin?
Fixing the look of the panel in 11.10
As far as just the look of the panel goes, seemy answertoHow to customize the gnome classic panelfor how to get back quite close to the original look. This is accomplished by, amongst other things, reducing the top panel's height and its icon sizes.
GNOME Classic:
With fixes:
13.04 and up
With Ubuntu 13.04 you can install the Gnome classic desktop in exactly the same way as for Ubuntu 12.04 and 12.10.
But now ...
Ubuntu GNOME has become an official derivative.
The first official release will be 13.04, which will be available by the end of April 2013. If you're itching to try it now, check out the daily images here.
Ubuntu GNOME (formerly Ubuntu GNOME Remix) is a mostly pure GNOME desktop experience built from the Ubuntu repositories. As the 12.10 release was our first release, there are still a few minor issues, but we proudly recommend Ubuntu GNOME to anyone interested in using Ubuntu with the best of what GNOME has to offer.
You can install this the same as any other Ubuntu from a live DVD and forgo anything related to Unity. Or install it as a dual boot alongside Ubuntu.
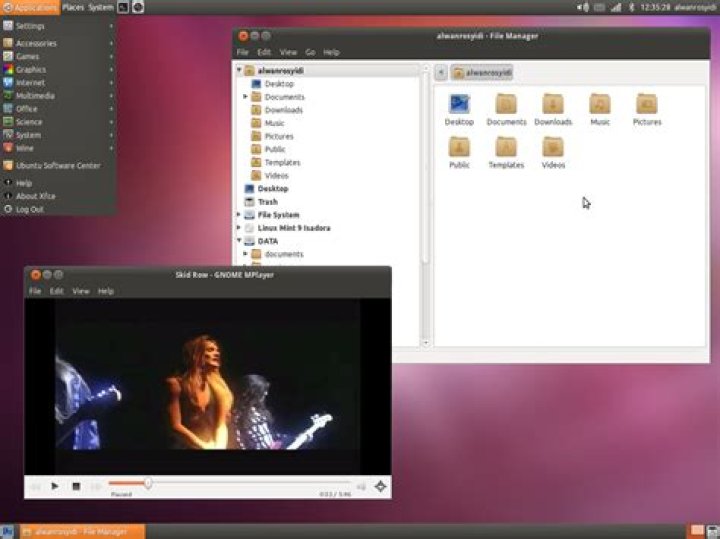
5There is another option. A small group of folks are working on a fork of Gnome 2 called Mate (pronounced MAH-tay, I think; could be wrong on the accent, but I'm reasonably certain it's meant to be two syllables). Its future is still uncertain, but the Linux Mint folks liked it enough to make it an option in their newest release. If you're willing to work outside the Ubuntu repositories, it's pretty easy to install. From the wiki:
Ubuntu Oneiric Ocelot:
Add the repo to /etc/apt/sources.list via the following command:
sudo add-apt-repository "deb oneiric main"or using a text editor of your choice add the following line to /etc/apt/sources.list:
deb oneiric mainTo install MATE:
sudo apt-get update
sudo apt-get install mate-archive-keyring
sudo apt-get install mate-core
Then simply log out and MATE should be a desktop option.
I tested it on Oneiric 32-bit, and it installs fine. Takes 310MB of storage, according to apt-get. Didn't require any packages to be removed or updated, so it should play well with others. Note that it's still a young project, though, so bugs and quirks are likely.
There's no Ubuntu branding/theming by default, but it takes the built-in themes (like Ambiance) reasonably well. And it includes the much-missed (for me, anyway) System menu!
2For 11.04 Ubuntu Classic
I don't know why, but 'Ubuntu Classic Desktop' session disable any Compiz effects for me
So in order to get my personal "Classic" version (with Compiz) I've done the following
How to disable Unity and start gnome-panel at each login:
- start a 'Ubuntu' session (with Unity)
open a terminal (Ctrl + Alt + T)
install ccsm
sudo apt-get install compizconfig-settings-managerstart ccsm
ccsmdisable Unity plugin
start Startup Applications Preferences
gnome-session-propertiesadd a gnome-panel entry
log out and log in
gnome-session-save --kill
Note 1: If you have a nvidia card and run some trouble starting Unity, you may want to
- install Additional Drivers NVIDIA accelerated driver (version 173)
and force Unity start
sudo sh -c "echo 'UNITY_FORCE_START=1' >> /etc/environment"
Note 2: If you want to restore default Unity settings run
unity --resetIt depends on what you want instead. You can no longer use Gnome2, at least not as easily. You can do a sudo apt-get install gnome-session for Gnome3 (which is worse than Unity imo) or you can get the lightweight xfce4 desktop sudo apt-get install xfce4, which is older looking, but very similar in functionality to Gnome2 (possibly even better). Another popular alternative is KDE, which you would get with sudo apt-get install kubuntu-desktop. Removing unity should be possible with sudo apt-get purge unity, though be careful, as it could inadvertantly uninstall software you may want. I recommend against removing Unity completely, and instead using one of the above desktop managers along side it.
To switch which one you use, just hit the little gear icon above your password field on the login screen.
0Step 1. Install Mate, Gnome Flashback, or XFCE
1a. Installing Mate
If you are running 14.04 fellow this instructions.
Click this link to install the Mate package, find it in the Ubuntu Software Center, or type
sudo apt-get install mint-desktop in a terminal. There are more instructions here
If you are running 12.04-13.10 fellow this instructions.
Type this in a terminal
# this add the repository
sudo add-apt-repository "deb $(lsb_release -cs) main"
sudo apt-get update
sudo apt-get install mate-archive-keyring
sudo apt-get update
# this installs base packages
sudo apt-get install mate-core
# this installs more packages
sudo apt-get install mate-desktop-environment
1b. Installing Gnome flashback (formerly Gnome Fallback)
If you are running 14.04 fellow this instructions.
Click this link to install the Gnome Flashback package, find it in the Ubuntu Software Center, or type
sudo apt-get install gnome-session-flashback in a terminal. There are more instructions here
If you are running 12.04-13.10 fellow this instructions.
Click this link to install the Gnome Fallback/Panel package, find it in the Ubuntu Software Center, or type
sudo apt-get install gnome-panel or sudo apt-get install gnome-session-fallback in a terminal. There are more instructions here
1c. Installing XFCE (XForms Common Environment)
Click this link to install the XFCE package, find it in the Ubuntu Software Center, or type
sudo apt-get install xubuntu-desktop in a terminal. There are more instructions here
Ubuntu has an XFCE spin called Xubuntu it is recommended to install it from the official image (.iso) that can be downloaded at this page.
Step 2. Make them look like Ubuntu 10.04.
2a. Making Mate
You need to get the Ambiance Theme so open up a terminal and type this in.
cd ~/Downloads
wget
sudo dpkg -i ambiance-mate_12.04_all.deb
Or download this file, click here to download and install it though Gdebi, Ubuntu Software center, or...
After it is done install, change the Theme to Ambiance MATE so open the Appearance preferences (located under System -> Preferences) and select the Ambiance MATE theme.
This is how It is going to look like
After that you now need to chance the wallpaper to the 10.04 one. so first you need to get them. So open up a terminal
cd ~/Downloads
wget
sudo dpkg -i ubuntu-wallpapers_0.31.3_all.deb
Or download this file, click here to download and install it though Gdebi, Ubuntu Software center, or...
After it is done install, change the wallpaper to the default in 10.04 so open the Appearance preferences (located under System -> Background) and select the the default in 10.04 wallpaper.
*Sorry I couldn't find a image for this micro-step.
2b. Making Gnome Flashback
You need to get the Ambiance theme if you don't ready have it. It isn't any different from the stock one that you need. If you don't have it click here to download it And just install it though Gdebi, Ubuntu Software Center, or tools like it. Finally you just need to chance the wallpaper to the one in 10.04 and you do that by just opening a terminal and type in
cd ~/Downloads
wget
sudo dpkg -i ubuntu-wallpapers_0.31.3_all.deb
Or download this file, click here to download and install it though Gdebi, Ubuntu Software center, or... And it is no difference into changing it from normal unity. More Info
2b. Making XFCE
Making the panels look like Gnome 2
First, Remove the the button panel by right clicking on it and select Delete. Add the Show Desktop, Window Buttons, Workspace Switcher and Trash Applet to the new button panel. Now we are done with the button panel now it is time for the button one so chance the panel size to 24px by right clicking on it and select Panel>Panel Preferences. Rename “File Manager” menu into “Places” by opening the handy terminal and type in sudo nano /usr/share/applications/xfce-settings-manager.desktop find the entry Name and change the entry into this Name=Settings Manager → Name=System save it and close it. Now Right click on the Panel Select Panel Preferences Than Items. Remove all default items and left 8 eight items : Applications Menu, Separator, Notification Area, add a separator between Applications Menu and Notification Area to be Expand by click the item, and click edit item by select Edit the currently selected item button at the bottom of Panel Preferences menu. Then, add two Launcher items and move them to the position after Applications Menu item. Set them to Show Label Instead of Icon, by clicking Edit the currently selected item>Advanced> Show Label Instead of Icon. Now, edit each launcher and add the two main applications. For first launcher, add the Places items by clicking Edit the currently selected item>General>Add new item, search and scroll down to get the Places item. For the second launcher, do the same but put the System item (that we have edited before from the xfce-settings-manager desktop menu).
Now, we have a good looking Gnome 2 panels.
Now We are going to change the theme to Ambiance
You need to get the Ambiance Theme so open up a terminal and type this in.
Add Ravefinity Project PPA sudo add-apt-repository ppa:ravefinity-project/ppa -y Update package information and install ambiance and radiance themes sudo apt-get update && sudo apt-get install ambiance-xfce-lxde radiance-xfce-lxde Install other colors variations (blue, green, purple, ...): sudo apt-get install ambiance-colors-xfce-lxde radiance-colors-xfce-lxde
Or download this file, click here to download and install it though Gdebi, Ubuntu Software center, or...
After it is done install, change the Theme to Ambiance.
This is how It is going to look like
After that you now need to chance the wallpaper to the 10.04 one. so first you need to get them. So open up a terminal
cd ~/Downloads
wget
sudo dpkg -i ubuntu-wallpapers_0.31.3_all.debOr download this file, click here to download and install it though Gdebi, Ubuntu Software center, or...
After it is done install, change the wallpaper to the default in 10.04 so open the Desktop Settings (Right on the desktop -> Desktop Setting) and select the the default in 10.04 wallpaper.
Step 3. Install MDM (Mate Display Manager)
You need to get the Ambiance Theme so open up a terminal and type this in.
sudo add-apt-repository ppa:noobslab/mint sudo apt-get update sudo apt-get install mdm mdm-themesDuring the installation you will get a window asking you to choose your default DM, like the one in the print screen. Choose MDM.
And That is it!!!
Sources
MATE is a lightweight desktop environment that uses the traditional panel desktop layout used in pre-Unity Ubuntu. The MATE desktop environment can be configured to have either one or two panels. Starting with mate-desktop-environment 1.20 MATE desktop environment has true high DPI support. High DPI will be supported by default in Ubuntu MATE 18.04 and later.
Ubuntu 14.10 and later
sudo apt update
sudo apt install mate-desktop-environment-extras
There are also other optional MATE packages available in the default Ubuntu repositories:
- mate-applets - Various applets for the MATE panel
- mate-icon-theme-faenza - MATE Faenza Desktop icon theme
- mate-media - MATE media utilities (metapackage)
- mate-notification-daemon - daemon for displaying passive pop-up notifications
- mate-power-manager - power management tool for the MATE desktop
- mate-screensaver - MATE screensaver and screen locker
- mate-system-monitor - Process viewer and system resource monitor for MATE
- mate-themes - Official themes for the MATE desktop
- mate-utils - MATE desktop utilities
- pluma - official text editor of the MATE desktop environment
- mate-gnome-main-menu-applet - GNOME start menu applet for MATE
- mate-netspeed - Traffic monitor applet for MATE
- mate-sensors-applet - Display readings from hardware sensors in your MATE panel
- mate-user-share - User level public file sharing via WebDAV or ObexFTP
- mozo - easy MATE menu editing tool
- mate-netbook - MATE utilities for netbooks
MATE for Ubuntu 14.04
Open the terminal, and complete the following steps to enable the appropriate PPAs and install MATE 1.8.1 on Ubuntu 14.04.
sudo apt-add-repository ppa:ubuntu-mate-dev/ppa
sudo apt-add-repository ppa:ubuntu-mate-dev/trusty-mate
sudo apt update
sudo apt upgrade
sudo apt install --no-install-recommends ubuntu-mate-core ubuntu-mate-desktop
Instead of lightdm use lightdm-gtk-greeter for the login display manager as recommended by the MATE team:
sudo apt-get install lightdm-gtk-greeter
sudo reboot
Ubuntu 12.04, 12.10 and 13.04
From the terminal run the following command to add the MATE PPA to your software sources:
sudo add-apt-repository "deb raring main"This is assuming you have Ubuntu 13.04 installed. For Ubuntu 12.04 substitute precise for raring. For Ubuntu 12.10 substitute quantal for raring.
Run the following commands:
sudo apt-get update
sudo apt-get --yes --quiet --allow-unauthenticated install mate-archive-keyring
sudo apt-get update
sudo apt-get install mate-core # this installs base packages
sudo apt-get install mate-desktop-environment # this installs more packages
Instead of lightdm use lightdm-gtk-greeter for the login display manager as recommended by the MATE team:
sudo apt-get install lightdm-gtk-greeter
sudo reboot
You just need to download another desktop environment that you like the best and then switch to that environment on the login screen. I think it keeps your preference for the next time you get on, so you don't have to select your environment of choice every time.
To switch to gnome and completely remove unity:
apt-get install gnome-desktop apt-get remove --purge unityMore in general

"Zoraya ter Beek, age 29, just died by assisted suicide in the Netherlands. She was physically healthy, but psychologically depressed. It's an abomination that an entire society would actively facilitate, even encourage, someone ending their own life because they had no hope. Th…"

